One of the easiest ways to figure out what size you need in a hockey jersey is to get one of your shirts that you like the way it fits you and lay it on a flat surface. You then need to get a measuring tape and take some measurements.
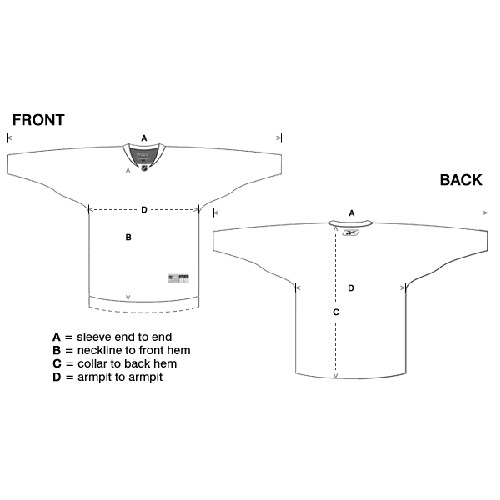
Chest – measure from armpit to armpit of your shirt then multiply by 2. Example: if your shirt is 18″ wide armpit to armpit X 2 = 36″ chest. If you want to have a looser fit than the shirt your measuring, add 4 to 8″ to this measurement. With a 36″ chest measurement, you would order 40″ chest in the jersey if you want a loose fit.
Sleeves – you can purchase ¾ sleeve length full length. You don’t want the full length sleeves too long for you so there are a couple of ways to measure your shirt. You can measure from cuff to cuff as some of the sizing charts give this measurement. The other is to measure each sleeve from the centre neck to wrist. Add 2 to 3″ to this measurement to allow for a bent elbow.
Length – just measure the length of your shirt and match it to the length on the size charts. For women please be aware that they do sell longer jerseys that are anywhere from 1″ to 2.5″ longer than the normal Women’s Jerseys – these are called fashion jerseys.
There you have it! A simple way to ensure your getting the best size jersey for you or a as a gift! We hope this guide has helped answer a few questions when it comes to jersey sizing! Since your here, come check and see our full line up of NHL jerseys, who knows you may find the size you need!
The post Simple Guide To Jersey Sizing appeared first on Slapshot Signatures.
No comments:
Post a Comment